
Back again with a quick basic tutorial. Ever wonder on how to size the envelopes that come in Artfully Sent and other cartridges? This will show you how to for every envelope, and every type of card, even shaped ones
For this example I am using image #MEF84B from Artfully sent. You will need a rectangle. I used image #M41F28. If you are doing a shaped card, use the shape instead.

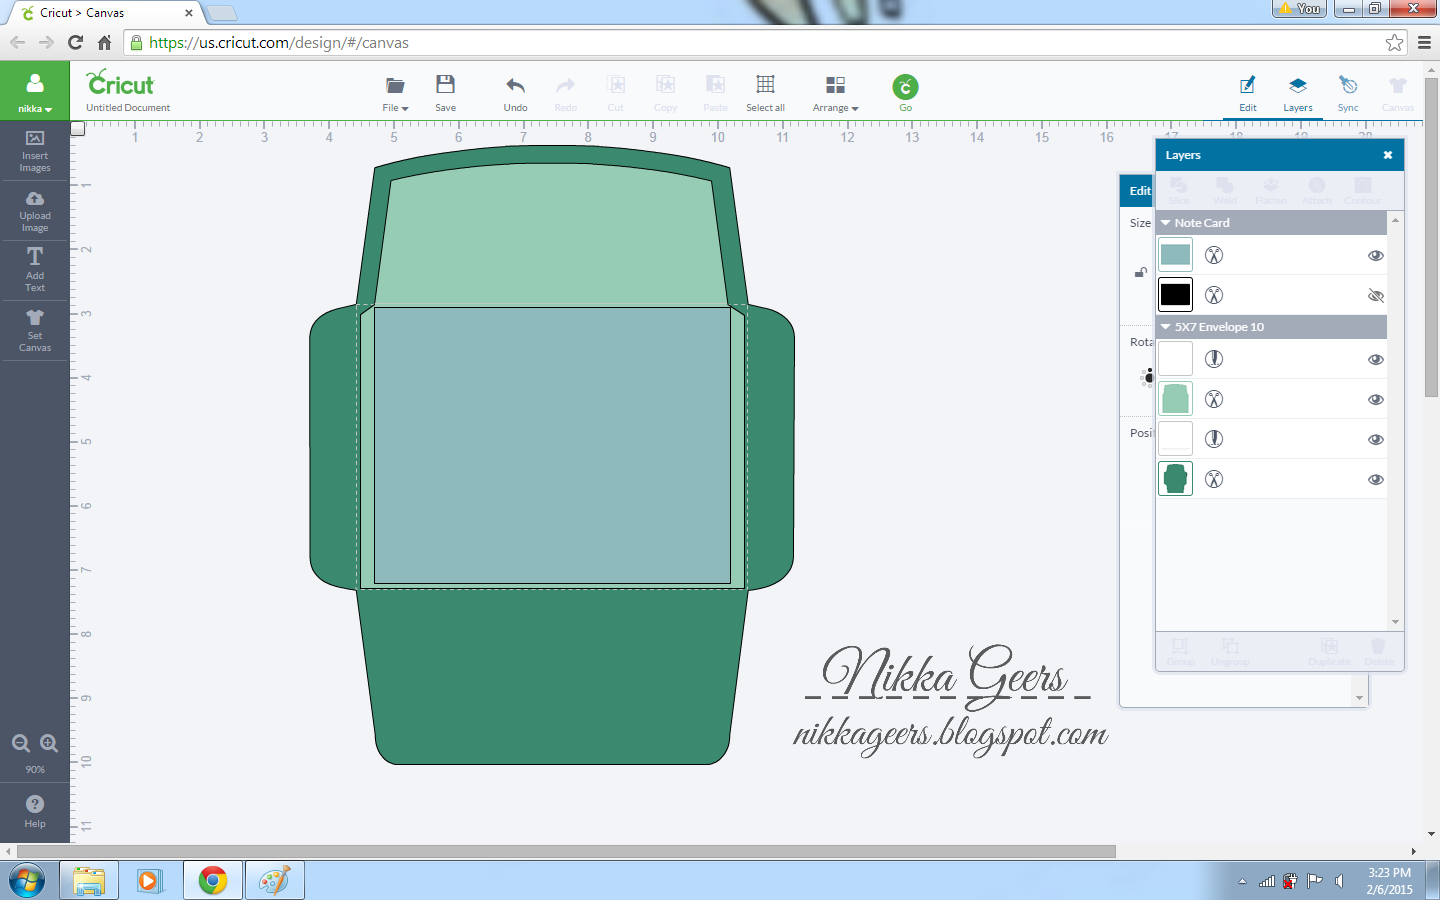
Size the rectangle the same size as the card. Using the edit box, unlock the size and enter the size. I used an A2 size card as an example, which is 4.25 x 5.5.

Center the rectangle in the middle of the screen. Using the dot in the corner, drag until the rectangle fits inside the envelope.

Double check the size. It needs to fit inside the score lines. Give a little room around the card so you can insert the card once it is glued. Give yourself more room if the card is a little thicker than most. If it is really thick, you will need to do a box envelope. I will show how to alter the envelopes later in the tutorial.
Once you get the sizes figured out, delete the rectangle. It was only needed for sizing.
Now to alter an envelope to a box envelope. Make the envelope larger than what you would use for a regular card. You envelope still need to fit the size of the card you are making.
Take a rectangle and make it slightly smaller than the inside of the envelope. Between the score lines. This all depends on the thickness of the card. The thicker the card, the smaller the rectangle will be.

Once you finished sizing, select the rectangle and change to score.
You will fold on both of the score lines and it will create a box.

There you go. You can size all your envelopes perfectly now. When you plan on using the liner, make sure it stays grouped when you are sizing. If you ungroup before sizing, it will be difficult to size it back again.
If you enjoyed this tutorial, check out my other tutorials on my {tutorial page}. And please join my {Facebook group} to get updates on new tutorials, artwork and specials.
I have used the following Close To My Heart products, you can purchase them at
Artfully Sent Cartridge Z3017
Is there a way to print this out to refer to when you need to used it?
ReplyDeleteYou can print from browser but it will print everything. I cant get a print option to work on my blog
DeleteThere is now a button at the bottom of the post that says print friendly. This will allow you to print the post without any of the extras
DeleteI highlighted everything I wanted to copy, then did a copy (CTL+C) and pasted (CTL+V) into Word. I had to do little bit of cleanup (re-format the background, change the text color to black, etc. I was able to print. Hope this helps.
ReplyDeleteI added a printer button so you dont have to do all that work to print
DeleteGreat idea to making envelopes all sizes, you tell me that can be making the my wedding envelope by using your idea.
ReplyDelete