
Hello. I am back with my first Ipad tutorial. I am making a card for the current challenge at {Heart 2 Heart} which is Think Pink and I wanted to try out the new app. So as I sat with my hubby watching tv, I designed this card. It was so easy.
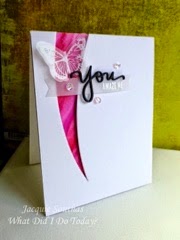
First I want to share my inspiration. I came across this card on Pinterest and had to make it. I just loved that cut out. After some trial and error, I was able to make this using Art Philosophy and the app.
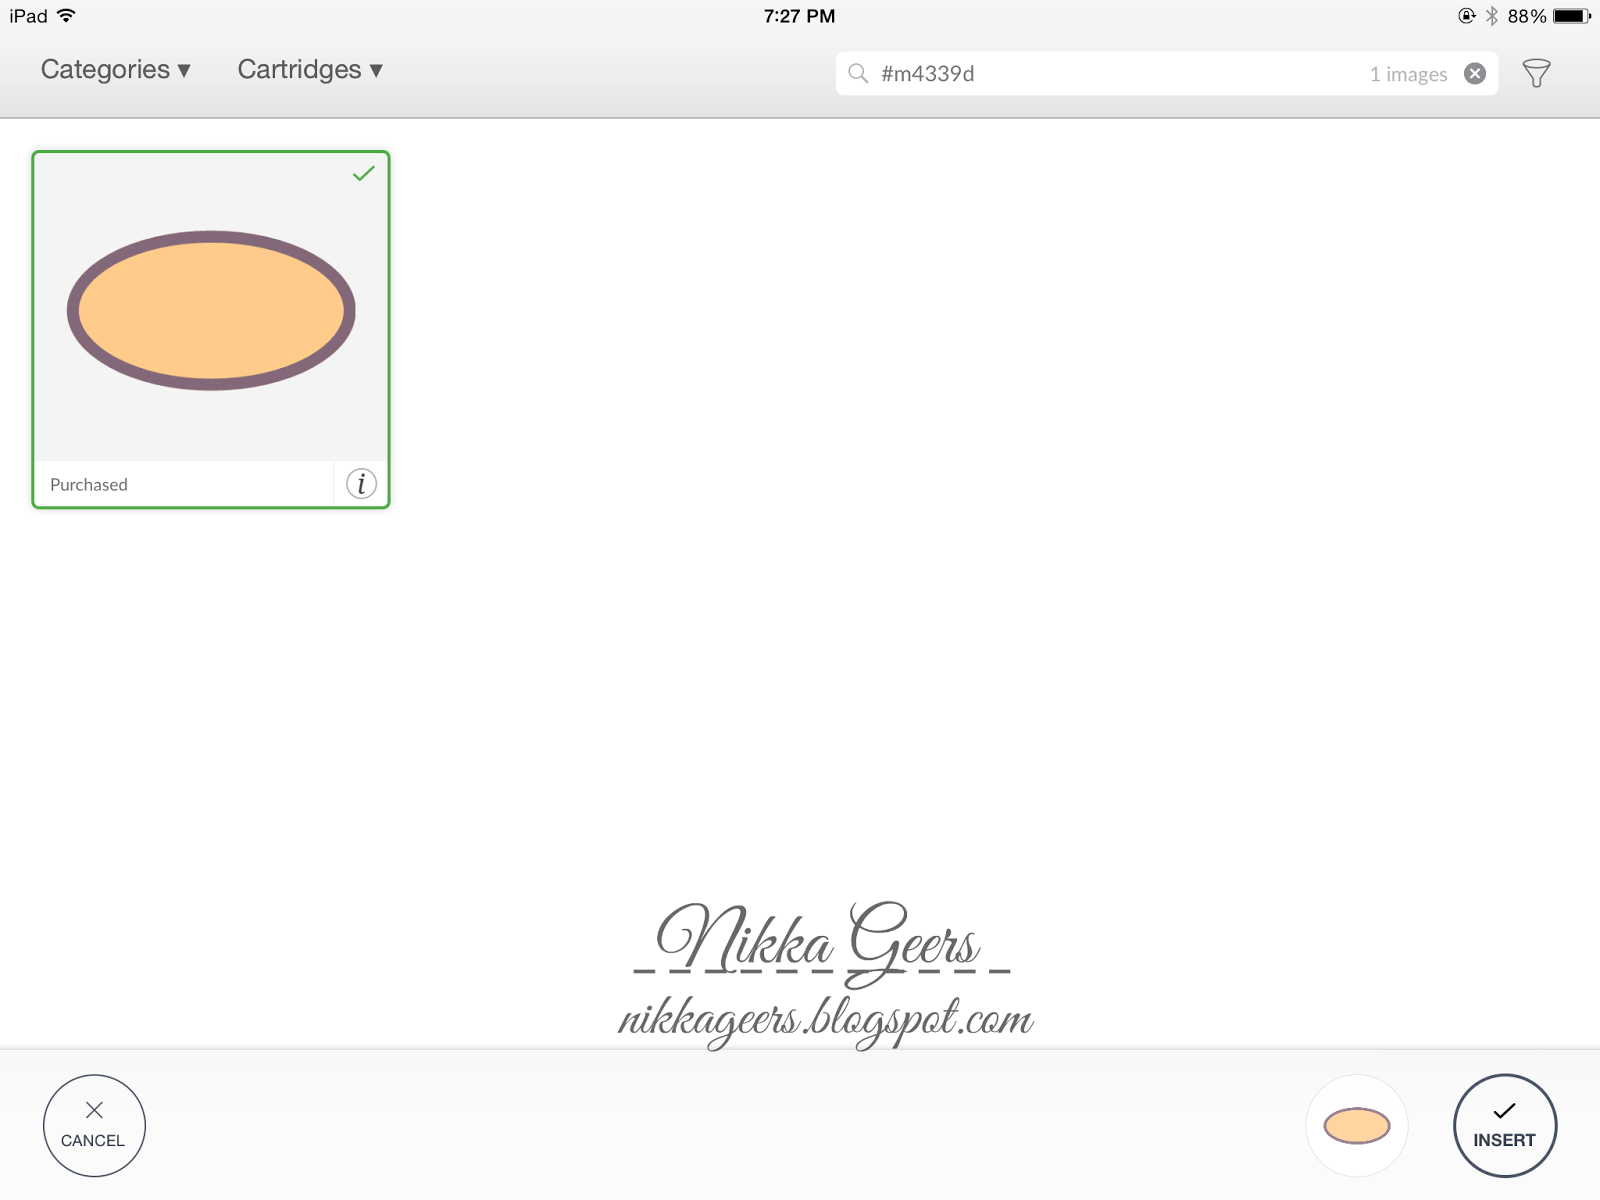
I had to get my image. I searched for the image I wanted #M4339D. So easy to do.

I needed two ovals to do this, so I used duplicate under actions.

Then I rotated using the rotate "button" when you click on the image. It is the top right button. I rotated until I liked the swish banner thingy, I am not sure what to call this shape.

You need to select the items. There is no select all option on the app. There are two ways to do this. The one I used here was click and drag around the images.
Then slice which is under actions.

This is a card, so I needed to make the card base. I used #M47638 from Art Philosophy for the card base and score line #M48E16.
Under edit, you can change the size. My card needed to be 8.5 x 5.5 to make an A2 card. Make sure to unlock and you can type in the size.
You can also click and drag with the bottom right button but this is easier and makes sure that you get the exact size.

Now I need to take the swish thingy out of the card. You can either attach or slice. Since my image was larger than the card, and I didn't want it cutting the whole thing out, I chose slice.
The second way to select you images is with the layers tab. Click and hold each layer and it will select it.

I had a problem with lining up the score line. With the app, it will line up the images, and 'lock' it in place. With this size screen, I thought it lined up at 4.25. I didn't double check the position and it was actually at 4 in. So I had to rescore it to make the card fold right. To make sure this doesn't happen to you, use the position option under edit. Enter 4.25 (which will turn to 4.2)
I like how the visible the score line is on the app. It's a solid line, not dotted like in Design Space.

I am making two cards, so I had it cut two card bases and my words. I selected all and attach so I could cut on one mat. Here is how I laid out the paper. The mat preview looks beautiful on the app. So easy to find the location to place my paper.
And with my bluetooth adapter, I was able to cut from the app. So awesome. I wish my laptop had bluetooth. I had my Explore fly across the room because I tripped over my cable and my dog ends up hitting the cable a lot when she lays on her bed.
And here is my completed project.

There is the pink for the challenge. And I made a blue boy one while I was at it.
The colored paper is cardstock with direct to paper inking on vellum. I layered the two. They aren't as dark as they look in the photos. It is hard to have the ink dry on vellum. I did take my heat tool to help, but it would still smudge so the ink is sitting directly on the cardstock so there is no color transfer. I messed up two card bases because of this. I used image #M41DB0 for the baby girl and #M4752D for baby boy, both from Artbooking cartridge.

I hope you enjoyed this tutorial and artwork I have shared today. I hope you will join us at {Heart 2 Heart} for the Think Pink challenge this week. You must use some Close To My Heart product to play along. So order yours today and come back to play.
If you would like to check out my other tutorials, visit my {tutorial page}.
To make sure you don't miss out on any new tutorials, artwork or members only specials, as it is easy to miss posts on Facebook and I don't post to all of them, join my {Facebook group}

If you would like to recreate this project, you can shop at {nikkageers.ctmh.com}
Recipe:
Baby Card Set
Stamps-
Paper-
White Daisy Cardstock 1385
Pixie Cardstock X5773
Glacier Cardstock X5770
Ink-
Crystal Blue Ink Pad Z2117
Cotton Candy Ink Pad Z2193
Other-
Art Philosophy Cartridge Z1686
Artbooking Cartridge Z1906
Liquid Glass Z679
This is a really cool idea! I have to find some time to play more with my own designs on my Cricut... Just haven't made it that far yet! Very interesting.
ReplyDeleteThese are very cool- love the pink for a girl and blue for a boy so now you can be prepared for either option!
ReplyDeleteI love it Nikki and I love that you provide the information on how you do these types of things, great job! Thanks for playing along with Heart 2 Heart Challenge!
ReplyDeleteBrandi R
H2H DT member
crzy4scrapbooking.blogspot.ca
Striking card! I like how you stuck with it until you figured it out.
ReplyDelete