
When you attach an image, it is like paper clipping them together. They will stay in the order you had them. Welding is like gluing them together. They become one image.

Both attach and weld are found at the top of the layers box. We will start with these two images heart (#M46EAC) and square (#M41949)

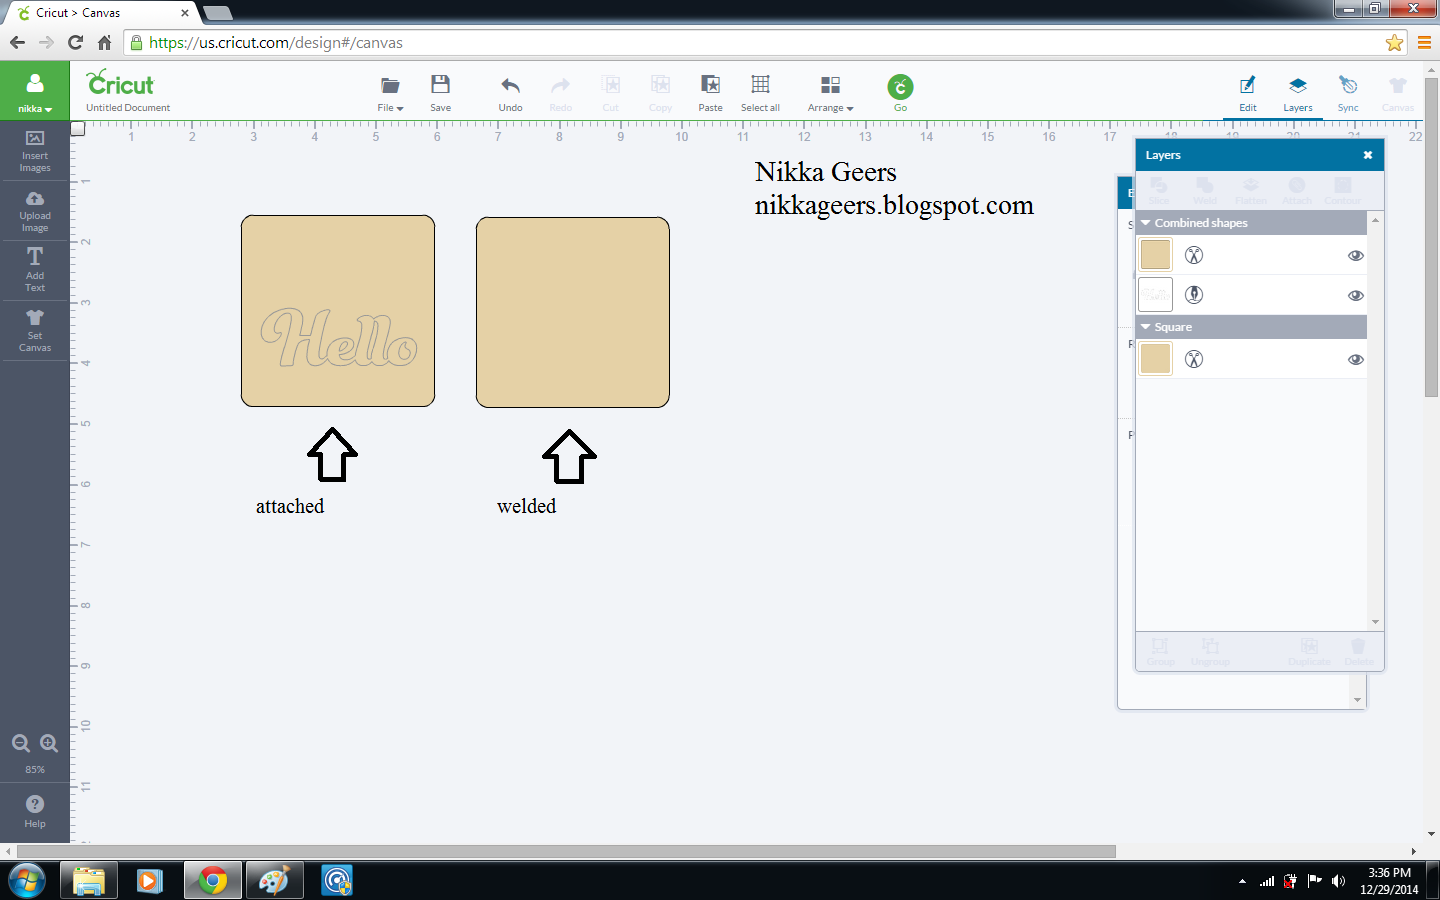
This is when you weld the two images together. It becomes one image.

This is what the cut screen will look like.

This is what it looks like when you attach two images. Notice how it still looks like two separate images because they are still separate images.

This is how the cut screen will look when you attach the two images.

When you cut them out, you can really tell the difference. The top is the attached image. It cut both images separately and where they overlapped got cut too. This ended up making 3 images.
The bottom is the welded image. It cuts out as one image.

Here is the attached image shown apart. the square got cut out and the heart got cut out and it cut where the image overlapped.
Here is writing on an image. You will use attach to keep the writing on the image, for example if you are adding text to a card. Where ever you place the text on the image is where it will stay when you attach. If you were to weld the text to the square, the text will disappear. And it will not cut or write.

Now when you go to weld, the images must be overlapping for them to weld together. The first image is welded without touching. It will not cut out as one image. The second image is properly welded together and will cut out as one image.

When using attach with text or image as a cut, the two will become the same color. This will have the word or image cut out exactly where it is laid.

When you go to the cut mat, it will show up as one image when attached. If not attached, it will cut separately. I changed the color of the text to show it on the same mat. If you where to keep it black like the photo above, it will cut out on a separate mat. This is how it will also look if you go to write the text instead. If not attached, it will write separately.

This is the same for images and text. If you want them to show in the same position as on the design canvas, you will want to attach.

This is the cut screen when you don't attach. It will go to space saver and everything will be all jumbled. If this happens when you don't want it to, go back and attach.
I hope this explains the difference between attach and weld. Remember, the main screen is the design canvas and placement on there will not be the same as the cut mat. You will want to attach if you want the placement to be the same. Once on the preview cut mat, you can move the group all together where you would like if you do not want it up in the top corner.
If you attach items but use the eye to hide the layer, it will not keep that once you go to the cut screen. For example, you are using a square to lay out where you want the text to go on an envelope. Once you hide that square, it will not keep that placement. It will still go to the top corner. Now you can change the square to score and leave out the score tool and it will leave nothing when it comes to that layer and keep the placement as you had it.
I want to update this to include print option. When it comes to a printable file, you will not have an option to attach. So if you want to keep teh same placement as on the design canvas, here is what you do.

When you select all, it does not give you the attach open. All you have is flatten.

Choose flatten and it will flatten everything you have on the screen

This will be what it looks like on the cut preview mat. Exactly how I laid it out.
Hope that answers all your questions on attach and weld. To see all the other tutorials, check out my {tutorial page}.
To make sure you don't miss out on any new tutorials, artwork or members only specials, as it is easy to miss posts on Facebook and I don't post to all of them, join my {Facebook group}
Subscribe to my {Youtube Channel} for updates on new Create Your Card videos.
I offer one on one classes for Cricut Design Space. Stop by for more {details}.
Art Philosophy Z1686
Artbooking Z1906
Thank you for your tutorials! They are so helpful and easy to follow. Just got my Explore up and running and while it seems a little frustrating, your tutorials are helping! I am determined to get this :)
ReplyDeleteThank you so much!! This was so helpful in solving our problem. So grateful!
ReplyDeleteI'd wondered what the difference was between welding and attaching. Any advice on when the welding option doesn't show up?
ReplyDelete