Wednesday, July 15, 2015

Jump on it


Welcome to our special blog hop. 


For this special blog hop, we will be using Hostess Only stamp sets that you can get for $5 during this special.


If you did not start here, you will be coming from {Lauren Moore}. Next in the hop is {Michelle Loncar}.  If you get lost along the way, you can find the list of the hoppers {here}.


I have had this card in progress since I got this stamp set last year. Kept getting distracted by other projects. This hop made me finally finish it. 
I used the stand from Here We Go to make my Christmas globe. The let it snow sentiment was larger than the globes that came with the stamp, so I bent the stamp to fit my globe. I love our clear stamps, You could not do this with rubber stamps. I did have to fussy cut the stand out. But it wasn't too difficult. The circle was cut using my Explore at 2 inches. 
I used clear embossing powder and inked the globe using Glacier ink.
The card itself is pretty simple. The globe is a pretty large image and I didn't want a busy card. Now that I look at the red paper, I should have cut it different so you could see the whole snowflakes. Although, it is kinda cool this way too.


Be Jolly Hostess Stamp

You can also get the stamp of the month for free with this Jump On It July special. You can check out the stamp of the month in action at the {SOTM Blog Hop}. 

Here a few other projects using the Hostess stamps.


 I hope you enjoyed today's post. Keep on hopping for more great artwork. Next is {Michelle Loncar}


To make sure you don't miss out on any new tutorials, artwork, videos or members only specials, as it is easy to miss posts on Facebook and I don't post to all of them, join my {Facebook group}.

Subscribe to my {Youtube Channel} for updates on new Create Your Card videos.

Follow me on {Instagram}

I offer one on one classes for Cricut Design Space. Stop by for more {details}.

If you would to like to recreate any of my projects, you can order the materials at {nikkageers.ctmh.com}.


Recipe:

Stamps -
   B1455  Be Jolly (Hostess Only)
   D1600  Here We Go

Paper -
    X7188B  Snowhaven Paper Pack
   1385  White Daisy Cardstock
   X254  Cards And Envelopes

Ink -
   Z891  Versamark
   Z2015  Black Ink Pad
   Z2641  Glacier Ink Pad

Other -
   Z2013  Silver Sequins
   Z2085  Clear Embossing Powder
   Z1686  Art Philosophy Cricut Cartridge


Wednesday, July 8, 2015

New goodies coming soon

Right now, it is like Christmas for us consultants. Our yearly convention has just started. We get to see all of the new goodies that will be available for you all in Sept. Sadly, I was not able to attend. But I will be glued to my Facebook during this whole convention. I will not be able to show any artwork on my blog until Sept, but I will be able to show sneak peeks in Facebook. And I am going to  start using Instagram to share as well.

I do have some good news tho. In Aug, you can get the brand new paper pack, and the brand new Cricut cartridge.  Once it get closer, I will share my special and other goodies. 


Join my {Facebook Group} or  Instagram

Monday, July 6, 2015

Happy Everything Blog Hop


Hello. We have a special blog hop for you guys this week. We are featuring Happy Everything. This hop is a circle, so keep hopping until you come back to where you started. If you have been hopping, you will be coming from {Kathleen Androlewicz}. Next in the hop is {Priscilla Gotham}. If you get lost along the way, you can find the whole lineup {here}


Happy everything is a special stamp set that will only be available until August 31. It is special because every stamp purchased, Close To My Heart donates $3 to Operation Smile. Plus every stamp set you purchase, a portion goes towards Operation Smile. Stop by {Operationsmile.org} to find out more about this organization and how to donate. 


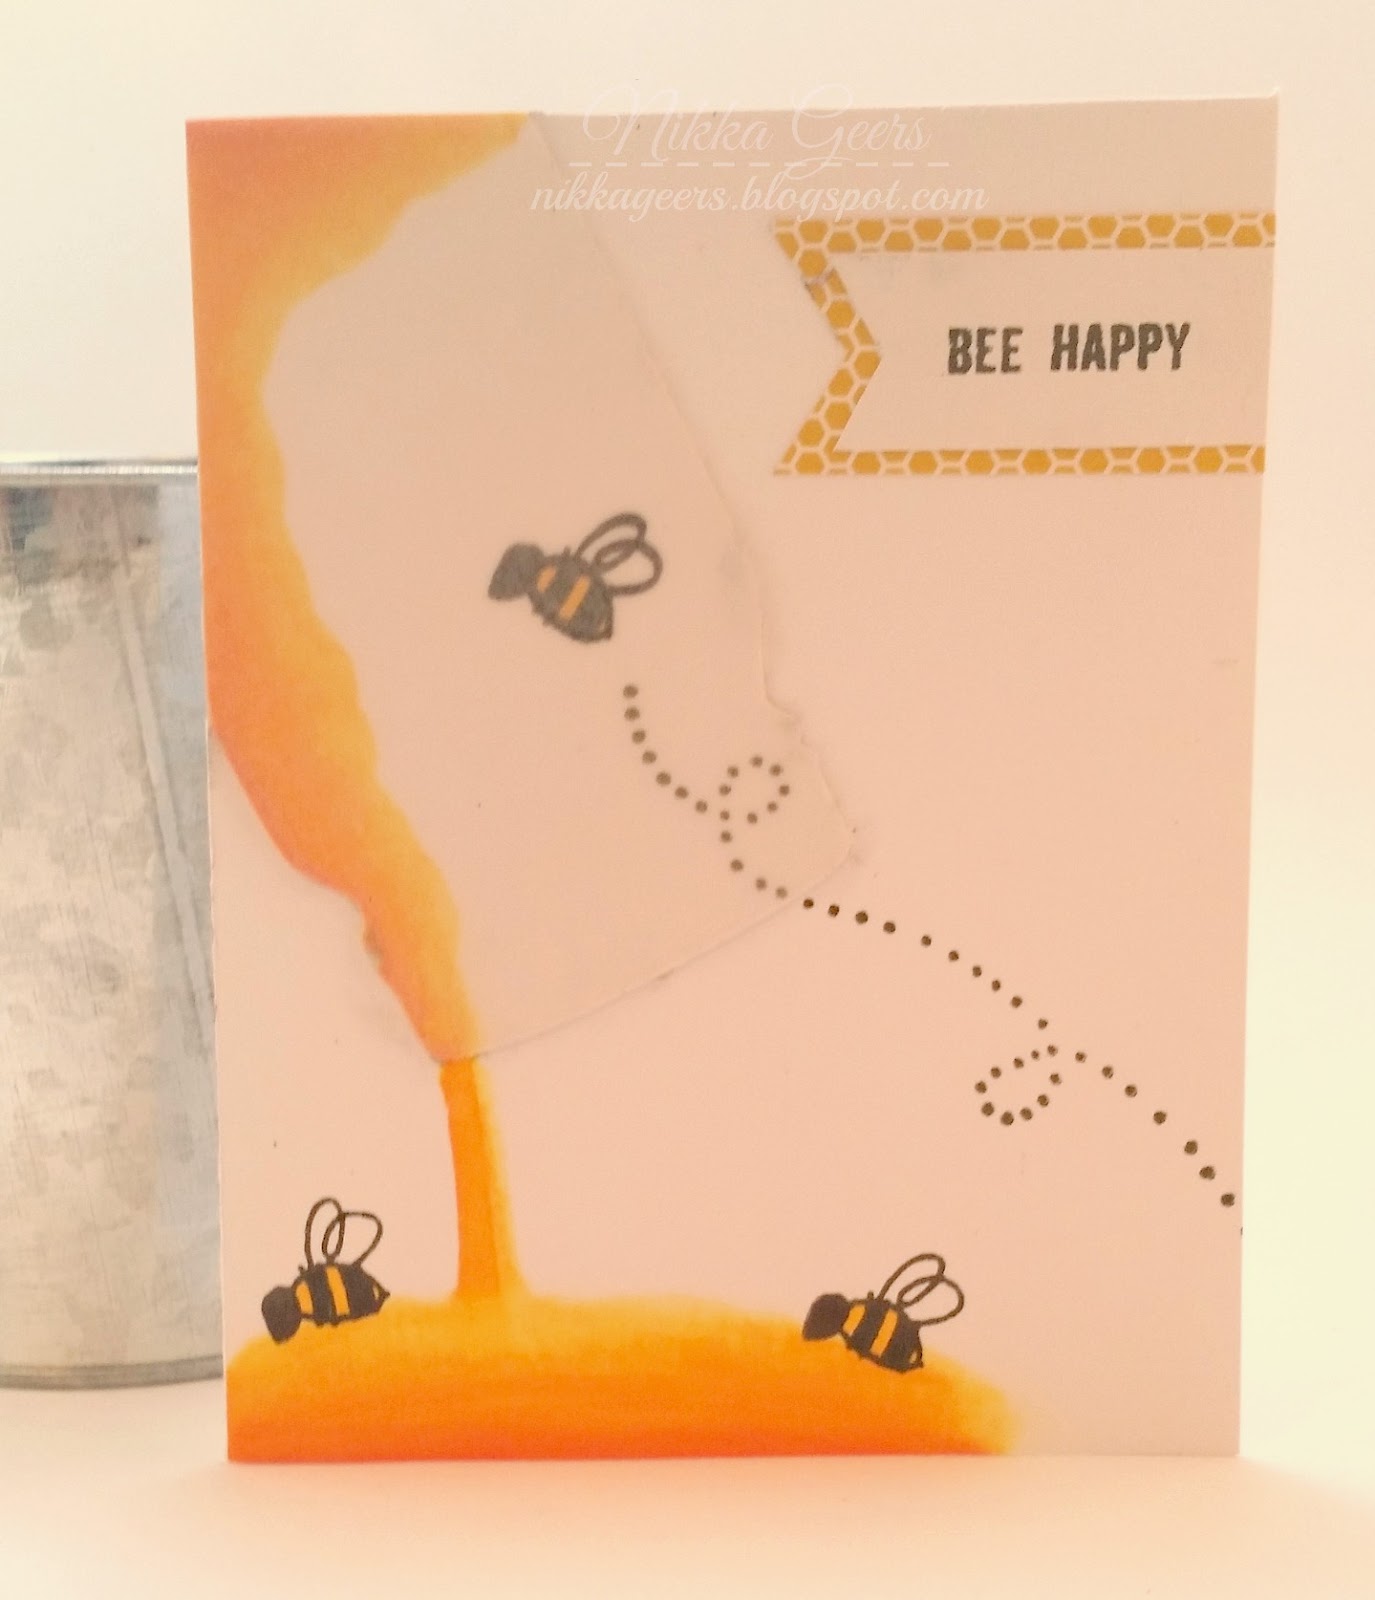
I have a friend who loves bees. So when I saw the bee in this stamp set, I knew I had to make a card for her. I kept playing around with ideas but never had a great idea to use.  Then I had an idea of a bee in the jar. We have a cute Hostess Rewards stamp that has jars, but none of them worked in my head. I kept wanting a mason jar. We have a mason jar in Artfully Sent, but it had spring on it and just wasn't the look I was going for. So I found a pic online and uploaded it into Design Space. I wanted the fireflies in the jar look, but couldn't get it to look right. I think I really needed bees in both directions for it to look good. 

While I was looking for jar in Pinterest, I saw a couple projects where the jar was on the top, pouring out whatever was inside. I kept trying to put the bees in the jar that way, but still wasn't getting what I wanted. Then I had the idea a honey dripping out of the jar and a couple bees on the ground. I still think maybe I should have gone with sponging ink for the honey instead of the markers. The markers make the honey very bright. Oh Well. It still works. 

I put vellum over the jar to give it more of the glass look. To get the vellum on the card without seeing the glue, I used double sided adhesive sheets. The glue is all over the vellum so you can't see it. The setting I used on the Explore was not the right setting. It didn't cut all the way through. I had to cut along the cut lines. I had already ejected the mat, so it couldn't get it to line up again to cut the second time. And I didn't want to waste the adhesive. The kind I got only has 2 sheets for $5. I did get it for 40% off, but still. A little too much to waste. Once I figure out the right setting, I will let you know.


I have also used this stamp on the following cards:


I hope you enjoyed this special hop. Please keep hopping. Next is {Priscilla Gotham}.


To make sure you don't miss out on any new tutorials, artwork, videos or members only specials, as it is easy to miss posts on Facebook and I don't post to all of them, join my {Facebook group}.

Subscribe to my {Youtube Channel} for updates on new Create Your Card videos.

I offer one on one classes for Cricut Design Space. Stop by for more {details}.

If you would to like to recreate any of my projects, you can order the materials at {nikkageers.ctmh.com}.


Recipe ;

Stamps -
   D1653  Happy Everything Operation Smile Stamp

Paper -
   1385  White Daisy Cardstock
   Z2032  Adventure Fundamentals (Honey)
   X254  Cards And Envelopes
   Non Ctmh Vellum, Adhesive Sheets

Ink -
   Z2105  Black Ink Pad
   Z2452  Golden Yellow ShinHan Marker
   Z2457  Marigold ShinHan Marker
   Z2467  Warm Grey (WG4) ShinHan Marker
   Z2469  Colorless Blender ShinHan Marker


Life Is A Picnic At Heart 2 Heart


Welcome to the first challenge with a brand new Design Team at {Heart 2 Heart}. This month has a theme. All of our challenges will be "Life Is". This week is Life Is A Picnic.


I am redoing all my old layouts. And I mean old. I started crafting back in the late 90's early 2000. Before Cricut. About the same time that Sizzix came out with that old heavy, red, lever die cutter. This layout was made before I got my machine. So all of the letters were hand cut with an Xacto blade. I am pretty impressed with myself. I started making 8.5 x 11 layouts. And 90's style paper. This layout isn't that bad. There was no mulberry paper. "shudder"  And the only crazy pattern paper was cut out to be individual images. 

 I started scrapbooking because I wanted to showcase all my pageant photos. I did beauty pageants before the fad. No tv shows, no murders. I did northern pageants. Which are completely different than southern pageants. Just believe me. As a queen, I did many appearances wearing my crown. Parades, helping out with games or collections. I did two events on the 4th back in 1996. Yes, that is little old me. Almost 20 years ago. I did a matching two page layout for each city on one page.  I knew I wanted to redo this page for this challenge.


We have no papers currently that can be used for a 4th of July layout. None. So I had to make my own. I used image #M44B64 from Artbooking. I used contour to removes some of the stripes. I really like hows this looks.
 This was my 3rd attempt. First, I wanted to sponge the background using the cut as stencil. Was going to take a while. Plus, I need to work on my sponging. Take two. Decided to just use cardstock. Trying to lay that pattern to the background onced glued, is near impossible. It bunched up and was impossible to separate. The third wasn't perfect, but I made it work. I kept the overlay on the Cricut mat. Added the glue and placed the cardstock on top. Found out the cuts weren't lined up on the mat, so the edges were not even. But I made it work by cutting the white part off and adding it to another piece of cardstock.  
The title was just as much of a pain.  I used the double sided adhesive sheets again. Pulled of the wrong side of the adhesive. It wouldn't stick to the mat. So placed cardstock on the mat. I forgot to mirror the cut. Had a hard time cutting the backing. Once I got it to start cutting through, found out that once I mirrored it, it changed the position so it did not cut on the piece. Ugh. Try two. Pulled the right side so I didn't have to mirror. Found the right setting, fabric +. Still messed up on the position. Finally got them done. I cut them all in white. I was going to put the cities right on the blue mat, but I wanted the mat to be smaller so you could see the stripes more.  So I made banners. Since I didn't want to recut the letters, I sponged them red. 
The layout needed a little extra. I had to add fireworks. It is a 4th of the July layout. I used an expired stamp set for the fireworks.


I wanted to use this stamp set, it is a Cricut stamp so it is still available. I got the stamp back when it was a stamp of the month. But I could not find it, anywhere. So I had to use the retired set. 
I wanted a pop of color, so I used the ShinHan markers to color the white sequins. I had to use other colors than red and blue. Fireworks are always colorful.


I wanted to do a different layout. The original layout isn't horrible, but I wanted something more interesting. I found this {pin} and it worked perfect for my photos. I didn'thave to change a size. 

We hope you join us for our Life Is A Picnic challenge. Stop by {Heart 2 Heart} to play along. You have all month to play along. You will need to use some Close To My Heart product to play along. If you do not have any, go to {nikkageers.ctmh.com}.  Then come back to play along. 


To make sure you don't miss out on any new tutorials, artwork, videos or members only specials, as it is easy to miss posts on Facebook and I don't post to all of them, join my {Facebook group}.

Subscribe to my {Youtube Channel} for updates on new Create Your Card videos.

I offer one on one classes for Cricut Design Space. Stop by for more {details}.

If you would to like to recreate any of my projects, you can order the materials at {nikkageers.ctmh.com}.


Recipe:

Stamps - 
   Kaboom (retired)

Paper - 
   1385  White Daisy Cardstock
   X5927  Ruby Cardstock
   X5759  Pacifica Cardstock

Ink - 
   Z891  Versamark Ink Pad
   Z2170  Ruby Ink Pad
   Z2452  Golden Yellow ShinHan Markers
   Z2466  Vivid Green ShinHan Markers
   Z2448  Carmine ShinHan Markers
   Z2453  Lavender ShinHan Markers

Other -
   Z2068  White Embossing Powder
   Z3024  Coral Reef Sequins (White)
   Z1906  Artbooking Cricut Cartridge 


Tuesday, June 30, 2015

Life Is Wonderful SOTM Blog Hop


Welcome to this months stamp of the month blog hop. this month we are featuring Life Is Wonderful.


This hop is a circle hop. Just keep going until you come back to where you started. If you have been hopping, you will be coming from {Paige Dolecki}. Next in the hop is {Jennifer Dykstra}. If you lose your way, stop by {here} for the complete list.


I made this valentines / anniversary / every day card. It can really be used for anything. I had to cut out the something that was on the bottom of the always remember stamp so I could fit the rest of my saying.  I had a hard time finding an 'I' to use. There was no 'I' in the happy to be friends stamp I used for the love you. And every one I found was not the right size. Then I remembered that the Artfully Sent bundle came with an alphabet. Perfect fit. There were two styles of 'I'. I thought the curly version fit the best. 


I used this sketch that I had saved. It is no longer available to link to their site, but I still liked it. I rotated the sketch and adapted to a A2 size card.  Plus I was inspired by a color challenge blog to use monochromatic.


I want to share a trick with you. When I need to figure out sizing or layout on a project, I do it in Design Space. I can get the exact measurements and cut out any piece I would like to use. I still use my paper trimmer for rectangles and squares. I did use the cricut for the banner (#M4235A). The cool thing about this is can use Design Space without owning a Explore. You can also do this in Craft Room, I think. I have never used Craft Room.

 I found this cool thing at {Courtney Lane Designs}. She has the hex codes, or html codes, for all the Close To My Heart colors. You can enter that below the custom color picker. So you can even figure out coloring when you are doing the mock ups. You can even do a print then cut image and have it match the colors perfectly. 


I hope you enjoyed today's project. Next in this hop is {Jennifer Dykstra}.

You can pick up this stamp set for $5 with qualifying purchase. Or jump on this months special.

You can get the stamp of the month for free, or your choice of hostess rewards stamps for $5, when you purchase $25 in stamps. The hostess reward option is a great offer, since normally you can only get these when you are a hostess of a gathering.
Don't wait, this special and the sotm are only available for the month of July.


If you would to like to recreate any of my projects, you can order the materials at {nikkageers.ctmh.com}.


If you would like to check out my tutorials, visit my {tutorial page}.

To make sure you don't miss out on any new tutorials, artwork, videos or members only specials, as it is easy to miss posts on Facebook and I don't post to all of them, join my {Facebook group}.

Subscribe to my {Youtube Channel} for updates on new Create Your Card videos.

I offer one on one classes for Cricut Design Space. Stop by for more {details}.


Recipe:

Stamps -
   S1507  Life Is Wonderful
   C1605  Happy To Be Friends
   D1630  Curlicue Alphabet (Artfully Sent Only) 

Paper -
   1385  White Daisy Cardstock
   1246  Hollyhock Cardstock
   X5760  Cotton Candy Cardstock
   X5773  Pixie Cardstock
   X5929  Whisper Cardstock
   X254  Cards and Envelopes

Ink -
   Z2172  Whisper Ink Pad

Other -
   Z2013  Silver Sequins
   Z1906  Artbooking Cricut Cartridge
   Z3017  Artfully Sent Cricut Cartridge


Tuesday, June 23, 2015

Technical difficulties

I apologize for the minimal posting. My computer is on the fritz and unable to make any videos or tutorial at the moment. I ordered some ram, and hopefully that will do the trick. I will be back as soon as I can. Until then, check out my videos and tutorials. They can be found {here}

Monday, June 22, 2015

Let Them Eat Cake at Heart 2 Heart

wrrereeee
Welcome. We have a new challenge for you over at {Heart 2 Heart}


This week is all about cake.

If you have seen some of my projects before, I love to use cakes as inspirations.  I get them at {CakeWrecks.com}  Now normally this site does what it says, show funny wrecks of professional cakes. But every Sunday they showcase beautiful, artful cakes. Which is where I get my inspiration. When I was told about this challenge, I knew I had a few steampunk cakes I was itching to do. 

If you have no idea what steampunk is, it is a cross between Victorian / Edwardian and 1900 technology. So it's a lot of lace and corsets and metal and gears. If you still don't quite understand, think Wild Wild West, the one with Will Smith. I have a whole board with steampunk ideas. You can even find smash ups with steampunk. Like steampunk Ariel, or steampunk Darth Vader. 

So back to my project. 


 I chose to use this steampunk cake. It is one of my favorites I have pinned. Simple yet awesome. You can find the {pin} here.


I used gears that can be found on Artiste cartridge. (#M3F34A, #M3B7A2). And the butterfly is from Art Philosophy (#M3EACD). Normally the metal used in steampunk is copper, but I did not have any copper ink, paper or embossing powder. So I had to use what I had. So I mixed silver and gold to make my own mix. It was hard to get the coloring right on the photo. But it looks cool. I got the hammered look by overheating the embossing powder until it started to bubble. It was hard to get that look consistently, so some are only half textured. Be careful, you do not want to burn the paper. Especially if you will be seeing the paper. It turns brown and ruins the paper.

Another detail you can't see in the photo is that I copied the embossed lines on the cake. I used a tool used in sewing to transfer pattern lines onto your fabric. It kinda looks like the gears. Gives the same look as it does on the cake. (side note, it it hard to spell gears right when you last name is Geers. I don't know how many times I had to go back and spell them right)

I hope you enjoyed my project for you today. We would love if you were to join us at {Heart 2 Heart}. Remember, you must use some Close To My Heart product to play along. If you don't have any, you can order some at {nikkageers.ctmh.com}. And then come back to play. You have all month long to play along with all of the months challenges.


If you would like to check out my other tutorials, visit my {tutorial page}.
To make sure you don't miss out on any new tutorials, artwork, videos or members only specials, as it is easy to miss posts on Facebook and I don't post to all of them, join my {Facebook group}.
Subscribe to my {Youtube Channel} for updates on new Create Your Card videos.
I offer one on one classes for Cricut Design Space. Stop by for more {details}
.If you would to like to recreate any of my projects, you can order the materials at {nikkageers.ctmh.com}.
Recipe:
Stamps -
   C1605  Happy To Be Friends
Paper -
   1388  Colonial White Cardstock
   1385  White Daisy Cardstock
   X1410  Colonial White Cards And Envelopes

Ink -
   Z2130  Indian Corn Blue Ink Pad
   Z891  Versamark Ink Pad
   Versamark Pen (non CTMH)

Other -
   Z2067  Silver Embossing Powder
   Z2066  Gold Embossing Powder
   Z1686  Art Philosophy Cricut Cartridge
   Z1790   Artiste Cricut Cartrdige
   Z555  Craft Heater