Saturday, February 28, 2015

Choose Happy - March Sotm blog hop


Welcome to this month's Stamp Of The Month Blog Hop. This is a circle blog hop, so keep hopping until you come back to the blog you started at. If you did not join up here, you should be coming from {Haley Dyer}. Next in the hop is {Maria Myers}


 We are featuring the stamp set Choose Happy. You can get this stamp set for $5 when you purchase $50 in product, but only for the month of March.


Normally, I would show you how to use this stamp set "out of the box", but I had a hard time finding a way to use this stamp set differently then shown. 

I did cut the stamp set apart to make this set of cards. I took the sentiment "choose happy" and cut the words apart so I could use the happy part. And I made a 5 piece card set with the word happy and other words from the Happy To Be Friends stamp set. The font was the same size so it works perfect. It has the nice script of happy and the basic font for the rest. It looks awesome. You would never guess they were two different stamp sets.


Yes, I just noticed the yellow card had messed up on the stamping. I am not sure why. I only saw it when I was editing my pictures. Oh Well.

I used our fundamentals papers which has an embossed side. Here is a good shot of the texture of the paper. 


Do you love this butterfly? It is actually from Artfully Sent (image #M10232F). But of course I could not use it as is. I used Design Space to remove the insides of the image, just leaving a solid  butterfly. You can find the tutorial on how to do this {here}. It is part of my 5 Minute Tutorial series. I do a new one every Sunday.


Now I have made another project using this stamp set, but you will have to stop back to see it. 

I have used this stamp set on {this tutorial}.

I hope you enjoyed this project. Next in the hop is {Maria Myers}

Check out all of my tutorials at my {tutorial page}

So you don't miss any of the new tutorials, artwork or exclusive members only specials, join my {Facebook group}. It is easy to miss a post in the Facebook groups and I don't post to all of them.

To order your own products to make these cards, visit {nikkageers.ctmh.com}.


Recipe:

Happy Butterfly Card Set

Stamps-
   Choose Happy S1503
   Happy To Be Friends C1605

Paper-
   White Daisy Cardstock 1385
   Cards and Envelopes X254
   Whimsy Fundamentals (Canary, Thistle, Smoothie) Z2033
   Adventure Fundamentals (Pear, Lagoon) Z2032

Ink-
   Black Ink Pad Z2105

Other-
   Artfully Sent Cartridge Z3017


Wednesday, February 25, 2015

Cricut coordinating stamps sets


Close To My Heart has stamp sets that work with our Cricut cartridges to cut out the images. You can find them throughout the Idea Books with a red outline around the image. But did you know that these stamp sets don't retire like other stamp sets. While our stamp sets are available for a year, and sometimes they even bring them back in the Idea Books, they keep all the ones that coordinate with the Cricut forever. Now, you are unable to find them in the Idea Books. But you can find them on my website at {http://nikkageers.ctmh.com/}  Click the link to bring you directly to all the Cricut stamps sets.

Now this stamp set, Inspirational Flourishes, came out in the beginning of 2014. And while you can not longer get the paper to go with this card, you can still get that great stamp set.


 I think this card would look great with the current Heartstrings paper pack.

So head to {nikkageers.ctmh.com} to find all the wonderful stamp sets that are still available . And with 4 Cricut cartridges, there are a lot of coordinating stamp sets.


Tuesday, February 24, 2015

Cricut Explore Tutorial - Ipad App Card


Hello. I am back with my first Ipad tutorial. I am making a card for the current challenge at {Heart 2 Heart} which is Think Pink and I wanted to try out the new app. So as I sat with my hubby watching tv, I designed this card. It was so easy.


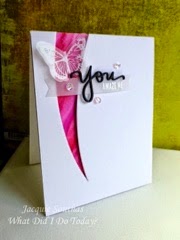
First I want to share my inspiration. I came across this card on Pinterest and had to make it. I just loved that cut out. After some trial and error, I was able to make this using Art Philosophy and the app.


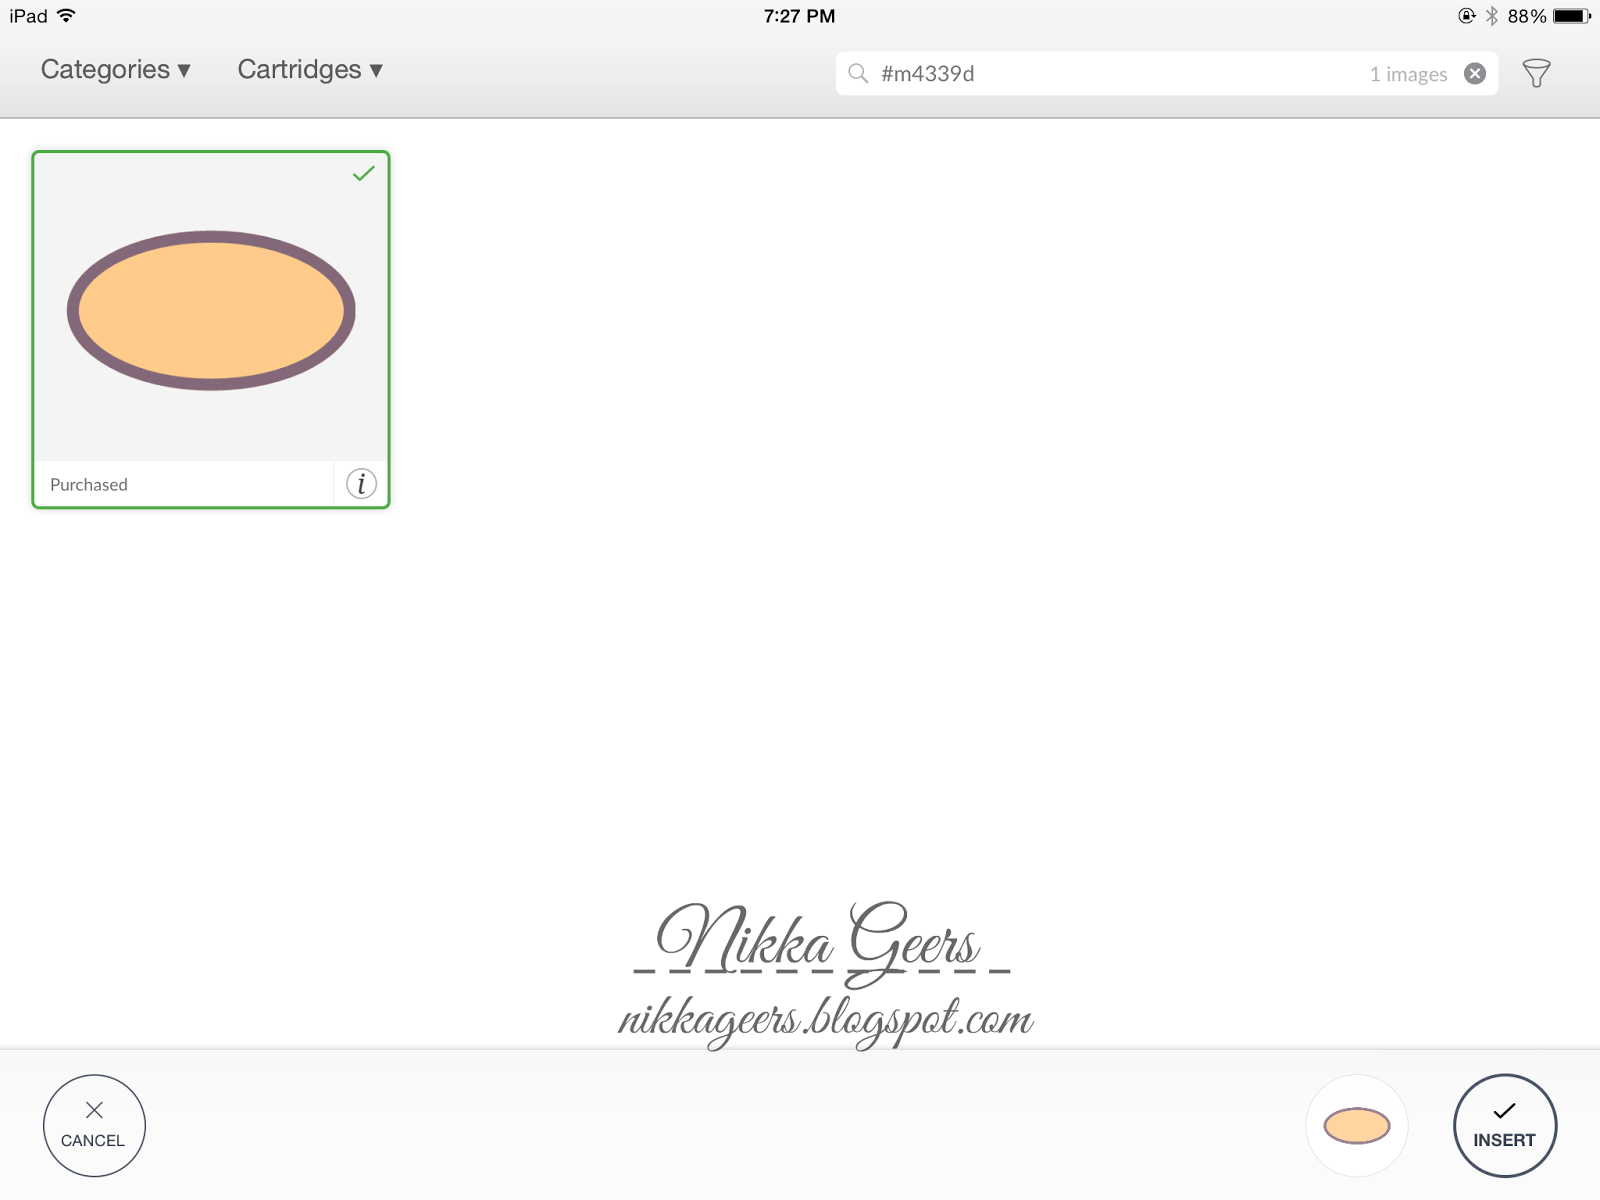
I had to get my image. I searched for the image I wanted #M4339D. So easy to do.


I needed two ovals to do this, so I used duplicate under actions.


Then I rotated using the rotate "button" when you click on the image. It is the top right button. I rotated until I liked the swish banner thingy, I am not sure what to call this shape.


You need to select the items. There is no select all option on the app. There are two ways to do this. The one I used here was click and drag around the images.
Then slice which is under actions.


This is a card, so I needed to make the card base. I used #M47638 from Art Philosophy for the card base and score line #M48E16. 
Under edit, you can change the size. My card needed to be 8.5 x 5.5 to make an A2 card. Make sure to unlock and you can type in the size.
You can also click and drag with the bottom right button but this is easier and makes sure that you get the exact size.


Now I need to take the swish thingy out of the card. You can either attach or slice. Since my image was larger than the card, and I didn't want it cutting the whole thing out, I chose slice.  
The second way to select you images is with the layers tab. Click and hold each layer and it will select it.


I had a problem with lining up the score line. With the app, it will line up the images, and 'lock' it in place. With this size screen, I thought it lined up at 4.25. I didn't double check the position and it was actually at 4 in. So I had to rescore it to make the card fold right. To make sure this doesn't happen to you, use the position option under edit. Enter 4.25 (which will turn to 4.2)
I like how the visible the score line is on the app. It's a solid line, not dotted like in Design Space.


I am making two cards, so I had it cut two card bases and my words. I selected all and attach so I could cut on one mat. Here is how I laid out the paper. The mat preview looks beautiful on the app. So easy to find the location to place my paper.

 And with my bluetooth adapter, I was able to cut from the app. So awesome. I wish my laptop had bluetooth. I had my Explore fly across the room because I tripped over my cable and my dog ends up hitting the cable a lot when she lays on her bed.

And here is my completed project.


There is the pink for the challenge. And I made a blue boy one while I was at it.
The colored paper is cardstock with direct to paper inking on vellum. I layered the two. They aren't as dark as they look in the photos. It is hard to have the ink dry on vellum. I did take my heat tool to help, but it would still smudge so the ink is sitting directly on the cardstock so there is no color transfer. I messed up two card bases because of this. I used image #M41DB0 for the baby girl and #M4752D for baby boy, both from Artbooking cartridge.


I hope you enjoyed this tutorial and artwork I have shared today. I hope you will join us at {Heart 2 Heart} for the Think Pink challenge this week. You must use some Close To My Heart product to play along. So order yours today and come back to play.

If you would like to check out my other tutorials, visit my {tutorial page}.

To make sure you don't miss out on any new tutorials, artwork or members only specials, as it is easy to miss posts on Facebook and I don't post to all of them, join my {Facebook group}


Subscribe to my {Youtube Channel} for updates on new Create Your Card videos.


I offer one on one classes for Cricut Design Space. Stop by for more {details}.

If you would like to recreate this project, you can shop at {nikkageers.ctmh.com}


Recipe:

Baby Card Set

Stamps-

Paper-
   White Daisy Cardstock 1385
   Pixie Cardstock X5773
   Glacier Cardstock X5770

Ink-
   Crystal Blue Ink Pad Z2117
   Cotton Candy Ink Pad Z2193

Other-
   Art Philosophy Cartridge Z1686
   Artbooking Cartridge Z1906
   Liquid Glass Z679


Sunday, February 22, 2015

5 Minute Tutorial - Watercolor Outline


It's Sunday so I have a brand new 5 minute tutorial for you.  This one will show you how you can take an image in Design Space and turn it into a watercolore image. So let's begin.


You will choose your image. I think any image will work since the Explore will be drawing the outline for you. I chose image #M106793 from Artfully Sent. It is a flower cluster. As with most of the images that come in this cartridge, it is grouped with all the images needed to make a pop up card. I deleted all the extra images I did not need.
The image was still part of the card, and I did not want that cut out so I used slice to get just the flower cluster. You will not need to do this is it just a regular image. 


And here is my working image.


You will need to select the image and change over to score.  We are doing a no outline watercolor so the score tool will draw out the outline for us to color in.


Use watercolor paper for this. I just bought a pad at Hobby Lobby. The score tool works really well on this type of paper. It is fairly easy to see the outline, which is what you want, 


I am using Close To My Heart dye inks to do my watercolor. How to do this is press your pad onto a nonstick mat, like the all purpose mat, to get a puddle of ink. Add a little bit of water and apply to you image. You could use watercolor pencils or actual watercolors for this. Each one will have a different look to it.


Just start coloring. With the outline being scored in, you have room to play. Once painted, you won't see the outlines so you can't make any mistakes. 


And my finished watercolor. 

I hope you enjoyed this week tutorial. Would love to see what you make so please add your project to the linky below.

To see all of my tutorial, visit my {tutorial page}

So you don't miss out on any tutorials, artwork or exclusive members only specials, please join my {Facebook group}. It is easy to miss posts in the Facebook groups and I don't post to all of them.


Subscribe to my {Youtube Channel} for updates on new Create Your Card videos.


I offer one on one classes for Cricut Design Space. Stop by for more {details}.

I have used the following Close To My Heart products, which you can purchase at {nikkageers.ctmh.com}

Artfully Sent Cartridge Z3017, All Purpose Mat Z2045, Pixie Ink Pad Z2644, Pear Ink Pad Z2197, Canary Ink Pad Z2643, Hollyhock Ink Pad Z2128, Ruby Ink Pad Z2120, Thistle Ink Pad Z2640, Topiary Ink Pad Z2155

Friday, February 20, 2015

Cricut Explore Tutorial - How To Upload Layers Without A SVG


Hello. It has been a while for a new tutorial, but I am back.  I want to be able to upload images with multiple layers but haven't had the time to play with Inkscape and make my own svg files. It seems like a lot of work, and I just don't have the time to sit down to try. So there had to be a way to easily upload an image in Design Space and have the layers that I want. But I gave up on the idea. For a bit. But one day, I was uploading an image and while I was cleaning it up, it dawned on me. What if I erased each color and had layers that way? So I tried, and it worked. YAY.  So lets get started.


Choose your image. It will help if it already has the colors. A black and white image will work, but you will have to pay more attention to the different layers.
I chose simple image upload. The colors are solid enough that it is easy to click each one.


Start with your first color. Erase everything that is not that color. Double check you cut by hitting preview.


Remember, when you go to save, unclick the preserve button. It should show a red outline only. No color. You want these to cut, not to print.


Go through each color, making it the only part of the image. With solid images like the circle, I didn't click the highlight out. That would have made the highlight cut out if I was to remove it. It was easier to make it a solid circle and just layer the highlights on top.


I made each highlight its own layer as well.


So now I upload all 4 layers of the image into Design Space.


They will come in black, and in different sizes. Not sure why Design Space does this, but that is how it is.


Change the colors so you can easily see each layer.


 Then one by one, size each layer so they fit perfectly. And there you go. I just made a 4 layered image in Design Space.  

Now, playing around, I have found that the image you start with needs to be crisp. If it is blurry, it makes it harder to get the perfect layers. You shouldn't need to use the eraser for many of these. The magic wand should remove most of the color. Every once in a while, the image will have a small border around it that you may need to erase. If you have to use the eraser a lot to make the layers, they may not line up well for the final image. And this will not be as good as making a svg. And now that svg files upload in the right sizes, it will make the layers fit perfectly. But if you are unable to make an svg, or want a quick way to do layers, this will work great for you.

I hope you enjoyed this tutorial. Check out all my other tutorials on my {tutorial page}

To make sure you don't miss out on any new tutorials, as it is easy to miss a post in Facebook groups, and I don't post to all of them, join my {Facebook group} to get updates on new tutorials, artwork and specials. 

Subscribe to my {Youtube Channel} for updates on new Create Your Card videos.


I offer one on one classes for Cricut Design Space. Stop by for more {details}.


Tuesday, February 17, 2015

Whats new in Design Space 2.0


Yay. Design Space 2.0 is up and running. There are a bunch of new features and bug fixes. So lets get started.


 They made everything full screen. When inserting images, you have small icons and large icons.


Click the 4 square button on the top of the screen to make the thumbnails larger.


There are new filters. To chose those, click the funnel on the top of the screen.
You can see your images, also filtered by uploaded, that are free, part of the subscription, and purchased. You can also filter by type of image and layers like the old filters. And they work. I always had problems with the old ones.


You can search by categories. You can now easily see the free this week images. You can also search by holidays, baby, ect. Also can search by brands.


 Cartridges are now filed alphabetical. They have thumbnails showing a few of the images. Plus it shows if there is a font with that cart. Clicking it will only open the cartridge. You still have to chose the font in the edit box. You can also buy the cartridge from this screen.


You can search for an image inside of a cartridge. Or use filters to narrow the search. 


It no longer pulls up the info by hovering. You will need to click the info button on the bottom right corner to pull up info including name, image codes, and cartridge name. You are still able to click on the cartridge name and pull up that cartridge.


On the bottom of the screen, you can easily delete an image by clicking on it.


Upload image is now full screen. There is a huge button the says preview to see what the cut will be. No more little eye.


The button the preserve the image for print then cut has moved to the right bottom of the screen. Remember to unclick this to have the image cut only.


SVG files now come in correct proportions. They maybe very large when they come in tho. 


The search bar is more visible for fonts. You can easily switch between cricut fonts, systems fonts and have a writing style. They are in a box just like the fonts. When searching, the full name will be shown beside it.


The layers, ect. boxes are now docked. 


But they can  be undocked by dragging them to the mat.


You can also have them do two at a time. Half on top and another half on the bottom. Just click and drag to the bottom.


Set canvas is now easier to use. They have more preset canvases. You can change the color just by clicking.


They change how to edit the image to have them the same between Design Space and the Ipad app.
Top left is the delete button. Top right is rotate. Bottom left is the lock for proportions. Bottom right is for sizing.


You can click the lock and it will change the right button. You can now drag to change the size in any direction.

The zoom button is now on the bottom left of the mat. You can click on the number to have it easily change back to 100%.


Things are labeled so no more hovering to find out what it does.


Mat Preview is now full screen. If you need to get back to the design mat, click the x on the top right of the screen.  You can easily change between the mats. Click the arrow on the left or right to scan through the mats. You have to change each mat individually to mirror image.


Even the 12 x 24 mat is full screen.It will keep the square mat, but have a yellow outline of 12 x 24. You can only place them items within the yellow outline. But no more scrolling to see the bottom of the mat.


If you set your dial to iron on, it will notify you if you did not mirror the image.


You can easily pay from Design Space. If you have the subscription, it will show your renewal date.

There you go. All the new changes to Design Space. Hope this makes everything smoother for your crafting. 

If you enjoyed the tutorial, check out all the others at my {tutorial page}.

To make sure you don't miss out on any new tutorials, artwork or specials, please join my {Facebook group}.  It is easy to miss them in the Cricut groups, and I do not post to all of them.

Subscribe to my {Youtube Channel} for updates on new Create Your Card videos.


I offer one on one classes for Cricut Design Space. Stop by for more {details}.